Monday, February 5, 2024

The Dirty Dozen: Twelve Bad Shooting Habits Updated

This is an update to an article I published over seven years ago.

Bad habits are something we all try to guard against, but they often creep into our shooting. Some shooters learn bad habits because the people teaching them do not know any better. Even when taught correctly, others develop bad habits through failing to apply what they have been taught. Flinching, anticipating the shot, chasing the sights, changing your grip, etc., are all bad habits. In this article I examine some of the more interesting variations I typically see.

1. Going too fast for your skill level.

This is an issue for shooters, instructors, and match safety officers. From the shooter perspective, do not try to go faster than you can safely perform the task. I tell novice shooters they must master the fundamentals of safely drawing and presenting the pistol before they try to speed up. 

The picture at right shows a video frame capture of a of a novice shooter trying to draw faster than his skill level. In this draw sequence, he fired the round into the ground approximately 3 feet in front of where he was standing. Although he did not believe he was doing it, he was subconsciously placing his finger on the trigger early in the draw process before his pistol cleared the holster and was pointed toward the target--a negligent discharge waiting to happen. 

This is not just a novice issue. I recently asked several accomplished Expert and Master-level shooters if they had ever felt the pistol muzzle with their support hand when they were trying to draw quickly. In other words, had they ever let the support hand get ahead of the firing hand on a draw? All admitted that had happened at least once when they were learning to draw and shoot quickly. Speed comes with the mastery of the fundamentals. Don't go too fast for your skill level. 

2. Performing ritualistic movements during static range training.

I see this all the time from novice shooters in classes and during pistol matches. One student would rotate the pistol to the left every time after he reloaded — even when doing the reload at speed. When I asked him why he did this, he sheepishly admitted he had seen someone else do it and thought it looked cool.

Unnecessary flourishes and motion might look cool to some, but this does nothing more than add time and inefficiency to the task. That extra half-second required to get your sights back on target adds up and could cost you your life in a self-defense encounter. Efficient pistol manipulation is critical to developing speed and eliminating unnecessary movement is the key.

3. Drawing slower as distance to the target increases.

I routinely see shooters who draw quickly when the target is close and who literally go into slow motion for distant targets. Your draw speed must be the same regardless of distance.

Indeed, the faster you draw for distant targets, the more time you will have to settle the sights and make an accurate shot. Keep your draw speed the same for every distance. 

4. Taking your finger out of the trigger guard between shots.

The only time your finger should be in the trigger guard is when you are intentionally firing a shot. That said, new shooters often take their finger completely out of the trigger guard between shots even when they intend to fire a follow-up shot. Instead, the shooter should release the trigger and allow the sear to reset and prepare for the next shot.

Trigger reset is the distance the trigger moves back toward its "at rest" position before it re-engages the internal linkages (sear, etc.) at which point the pistol may be fired again. This distance varies among pistol designs. All motion equals time, so you want to eliminate unnecessary motion.

For those who wish to advance further, the next step is to train yourself to begin resetting the trigger as soon as you feel the pistol start to recoil. Your goal is to have the sear reset as soon as your gun returns to battery (slide fully closed). Then, as the pistol settles and the sights return to the target after recoil recovery, you are ready to press the trigger once again. 

With practice, most shooters should be able to easily achieve splits (the time between shots) of 0.25 - 0.30 seconds. Many shooters will get in the 0.19 to 0.24 range and truly advanced shooters will get into the 0.14 to 0.18 range with some going beyond. Gordon Carrell, who has more than 60 national, regional and state titles including the 2011 Smith & Wesson Indoor National Championship, once told me his fastest recorded split was 0.11 seconds. A friend of mine who is an IDPA 6-gun Master did it in 0.08 seconds as measured frame-by-frame in a video.

5. Failure to maintain a solid firing grip.

Anytime you have your pistol in your hand, have it in a solid firing grip with all fingers engaged in gripping the pistol except the trigger trigger finger which should be along the slide or frame outside the trigger guard. This includes initially loading the pistol. Do not switch hands when loading -- have the magazine in a pouch or pocket accessible to the non-firing hand. When holstering the pistol, some shooters just sort of hold the pistol’s slide and grip--a sure recipe for eventually dropping the loaded pistol when they snag something as they attempt to holster. Maintain a solid grip with the firing hand.

6. Unnecessarily adjusting your grip:

Another common problem is the shooter who unnecessarily adjusts or re-grasps his pistol before and during a firing string. This is a bad habit that always seems to be waiting in the wings. I typically see this immediately after the draw; however I've seen novice and even experienced shooters do it after every shot.

More unnecessary motion. Learn to acquire a solid firing grip as you initially grasp the pistol while it is in the holster, then maintain that grip as your support hand comes into play and you begin to fire. 

7. Pointing the pistol at yourself when you holster: 

Some shooters tend to dig for the holster with the pistol's muzzle when they holster the pistol. This is often accompanied by the shooter pointing the pistol inward toward his hip or waist. 

This is common when the shooter is using an inside-the-waistband holster (IWB) or when using a holster design that allows the mouth of the holster to collapse when the pistol is withdrawn. Although not as much of a problem with outside-the-waistband (OWB) holsters, I've seen shooters do it with this design as well. Don't point a loaded pistol at yourself. (Note: Some IDPA guys had an absolute fit when I originally used this picture.  The pistol had a chamber flag and was clear of ammunition.)

8. Failure to train with the auto-lock trigger finger manipulation holster:

The auto-lock trigger finger manipulation holster has been commercially available since 2006 with at least four variations currently on the market. As a retention holster, this design protects and retains the pistol well and automatically "locks" the pistol in the holster when it is inserted without the need to manipulate anything.

The retention release mechanism is located on the outboard side, in the pistol's trigger/trigger guard area. To properly operate the release, the shooter establishes a strong-hand grip, extending and straightening the trigger finger exactly like a draw from any style of holster. The shooter then applies finger-pad pressure with the trigger finger to the "release button" that deactivates the retention and allows the shooter to draw the pistol.

However, unless the shooter deactivates the retention before beginning upward pressure as part of the draw, the retention continues to hold the pistol in the holster. Often, the inexperienced shooter then begins tugging on the pistol and tends to transition from finger-pad to finger-tip pressure causing the trigger finger to bend.

When the novice shooter finally manages to deactivate the retention and draws the pistol, this bend in the trigger finger positions the finger near or on the trigger, and the finger tends to stay in motion. As the trigger guard clears the holster, the finger enters the trigger guard and contacts the trigger — occasionally with unpleasant results. I have witnessed two people shoot themselves doing exactly this.

The holster is not the problem, it works exactly as designed. If you are going to use an auto-lock trigger finger manipulation holster, you absolutely must train with the holster until a safe draw is second nature — for that matter, you should do this with any holster you use.

For Safety Officers: You will see the belt rise if someone is doing this. Stop them immediately and explain what they are doing incorrectly.

9. Failure to clear cloth in holster: 

IDPA, USPSA, IPSC, CAS, etc are all active sports, and shooters often have their shirt tails or other garments drift out during the course of a stage. If the shooter fails to clear this cloth from the mouth of the holster when he re-holsters his pistol, this cloth can find its way into the trigger guard.

As the shooter presses the pistol into the holster, the cloth jams, which can lead to an unwelcome loud noise as the cloth tightens around and pulls the trigger. Always visually confirm that your holster is completely clear of any cloth or other obstruction when you holster a loaded pistol.

10. Placing empty or partially empty magazines in your mag pouch:

I cannot guess the number of times I've seen shooters put an empty or partially empty magazine into their mag pouch, then later discover it is not fully charged when they run out of ammunition. In a match, this is cause for laughter at the competitor's expense, but in a self-defense encounter it could be fatal.

Stow your empties in a pocket, not in the pouch.

11. Crowding Cover:

Novices frequently want to crowd (get extremely close to) cover. This limits their available work-space to manipulate the pistol and may lead them to point the pistol in an unsafe direction as they maneuver to the next firing position.

With IDPA fault lines, a shooter is considered behind cover no matter how of much his upper torso is exposed, as long as his feet are not touching the ground on the other side of the fault line. The fault line must extend at least three feet from the cover barrier. Not crowding the cover provides space to manipulate your pistol and maneuver.

On the competition stage design side, I occasionally see stages designed in such a manner that they force shooters to crowd cover. In a IDPA match where I served as safety officer, one stage required the shooter to maneuver in a tight V-shaped barricade space and fire through ports. The stage had a barrel obstacle in the center of the V which forced the shooter to maneuver close to cover and prevented the Safety Officers from staying with the shooter as they fired the stage — obviously a less-than-optimal design.

On a related note, many stages have ports through which the shooter must engage a target. Shooting through the port does not mean you must stick the entire pistol through the port. The time you lose poking your pistol through is doubled when you now must pull it back out before you can move on. More inefficient and unnecessary motion.

12. Hollywood Ready

At some point, film and television producers began directing the actors to hold the pistol vertically next to their face so both were visible in the scene. This generated a bad habit among novice shooters who believe pointing the barrel at the sky is an appropriate ready position.

There are several reasons not to do this, including the fact that if you fire a round with the pistol next to your face you will likely cause permanent hearing loss. 

I often see novice competitors who are crowding cover use the "Hollywood ready" as they move away from a shooting position. Step away from the cover and use a low ready or compressed ready when you move. 

Bad Habits

These are some of the bad habits I've seen — I suspect there are others and welcome comments or input.

If you like this article please click subscribe in the upper right corner.

Tuesday, January 16, 2024

Pattern Your Home Defense Shotgun

A critical, but often overlooked aspect of being prepared to use your home defense shotgun is determining the pattern that your shotgun produces with a particular buckshot load. In shotgun circles, this process is called patterning your shotgun.

Without patterning you will not know the size and shape of your shotgun’s pattern with a given load at a given distance. You must do this with the ammunition you intend to use in your home defense shotgun. The way manufacturers produce shotgun barrels means that no two guns will pattern exactly alike--even with the exact same ammunition. Your gun may pattern very poorly with one brand or size of buckshot, yet do very well with another. The only way to know is to shoot the buckshot loads at varying distances.

Pattern Size: A rough estimate is that your pattern size will grow about one inch per yard of travel in a typical home defense shotgun with standard buckshot loads. Federal LE133 and the equivalent Speer loads are the exception and usually shoot a much tighter pattern. You should experiment with different loads and different brands to find the load that works the best in your particular gun.

Pattern Concentricity and Consistency: The pattern needs to be roughly round in shape with pellets evenly distributed throughout the covered area.

Effective Range: With buckshot, your maximum defensive range is the distance that all of your pellets impact within 4-inches of your point of aim (i.e. within an 8-inch circle). This may be 10, 15, 20, or even 25 yards or more depending upon the load/gun combination you select. The distance where your gun with the particular load you are using throws even one pellet outside of the 8-inch circle is the maximum defensive range for your shotgun with that load. Once you reach a distance where your pellets impact farther than 4-inches from your point of aim, the odds are very high that you will miss with one or more of the pellets and potentially endanger others in addition to your target.

A Pattern Experiment: In December of 2023 I experimented with the Federal LE-133 8-pellet buckshot load in two different shotguns—one was a Remington 870 pump shotgun and one was a Beretta 1301. Both shotguns had cylinder bores. I fired five rounds from each gun at 5, 10, 15, 20, and 25 yards.

The pattern from both guns at five and ten yards was essentially one hole (the lower right hole at ten yards with the 1301 was shooter error. 

At fifteen yards, the Remington 870 and the Beretta 1301 patterns remained acceptable. At twenty yards, the Remington 870 threw one pellet out of the acceptable pattern circumference (small circle). The Beretta 1301’s pattern remained within tolerance. 

At twenty five yards, the Remington 870’s pattern was over fifteen inches in diameter while the 1301 remained (barely) within an eight inch circle. I need to check the zero of the Beretta 1301's optic and laser at twenty five yards. For a YouTube video of the patterning process click here.

Unless your house is very large, the maximum home defense engagement distance is likely to be less than twenty yards and for most of us, less than fifteen yards. That said, both of these shotguns patterned acceptably at five - fifteen yards with the Federal LE-133 buckshot lot that I used in this experiment. 

If your target is beyond the maximum defensive buckshot range for your gun, you would either need to transition to a slug load or maneuver to get closer. Never forget that a single buckshot pellet can kill and you are accountable for every pellet that leaves your gun.

As we saw in this experiment, at shorter ranges your buckshot charge will not have opened and you are essentially shooting a very large single projectile that must be precisely aimed just like any bullet.

In an earlier experiment, a Fiocchi 9-pellet standard buckshot load in my Beretta 1301 shotgun at a distance of twelve yards generally put all nine pellets within a ten inch circle. I say generally because occasionally this load throws one wild pellet off the target at that distance. 

With the wild 9th pellet flyer potential, I consider the Fiocchi 9-pellet buckshot load to have a ten yard effective range in that particular gun. In contrast, the Federal 8-pellet 00 LE133 Buckshot load put all 8 pellets through a hole 2-inches in diameter at the same distance.

My Remington 870 and my Beretta 1301 have occasionally patterned acceptably out to 35 yards with some lots of Federal LE133 in the past. That said, I have noticed erratic behavior from Federal 8-pellet LE133 lots at times so I will stick to 25 yards or less for the Beretta and fifteen yards or less with the Remington 870 which exceeds the maximum potential defensive engagement distances in my home. 

If you like these articles you can follow by clicking the link in the upper right corner.


Wednesday, December 13, 2023

HE STOLE MY STUFF!!

Searching Vehicles
On 2 December 2023, gunfire shattered a San Antonio, Texas neighborhood’s quiet. Apparently, a group of young thugs were breaking into a truck when the owner caught them. The thugs fled and the owner reportedly got in his truck to chase them, driving around the neighborhood until he came across the thieves actively breaking into another neighbor’s automobile. The truck owner exited his pickup and confronted the thugs. One ran to a resident’s driveway and hid in front of their car. The thug then opened fire on the truck owner with a pistol.

The resident reported that she heard two gunshots and that she immediately ran, got her kids out of their beds, and onto the floor. Six additional gunshots followed the first two while the resident called the police. When the police arrived, they found shell casings on the caller’s front porch.

When it was all said and done, the thugs had fled and no one was hurt. According to the police, gangs of thugs are searching neighborhoods and looking for unlocked vehicles to ransack or KIA cars to steal. This particular variation of criminal behavior is becoming epidemic in San Antonio, Texas and surrounding cities.

One has to wonder what the truck owner was thinking when he exited his vehicle and confronted the thug. Probably the same thing a number of defenders are thinking when they leap to confront fleeing criminals—NO ONE STEALS MY STUFF!! The defenders certainly are not thinking of the potential life changing consequences of their actions. In this case, the criminal was willing to use deadly force against the truck owner and the owner survived because the thug was a poor shot.

This was not the case in another incident that news organizations widely reported. A man and his female companion exited a shopping mall and the man noticed that his Ford pickup truck was missing. As the pair attempted to locate the truck, they saw it in a nearby parking lot at the same mall with the presumed thugs still sitting in it.

The owner approached his truck, displayed a pistol, and ordered 34 year old Kevin Eric Garcia (the driver) and the Garcia’s 25-year-old female passenger to step outside and sit on the pavement. Moments after the owner called police, Garcia drew a pistol from his waistband and shot the truck's owner. The owner returned fire, hitting, and killing Garcia and critically wounding his companion.

Police Assisting Garcia's Wounded Companion
After police arrived, the truck’s owner and Garcia's female companion were taken to the hospital. The owner was in stable condition and the female thug was in critical condition at that time. As of this writing, no charges have been filed against the truck’s owner.

In most states, using deadly force to defend property is problematic at best. Although Texas Penal Code (Title 2, sec 9.41 & 9.42) does permit using force and (under certain circumstances) deadly force to protect or recover property, the consequences faced in doing so can be considerable.

Trying to hold any individual at gunpoint is extremely dangerous—particularly if that individual has a hidden weapon. At least for the moment, the thug knows that you have decided not to shoot; otherwise you would have already fired. That gives him the advantage of being able to plan an immediate response to your inaction. If you are in the open and in close proximity, the thug has a clear (if fleeting) time advantage.

Your ability to react to the thug’s movements come into play as well. The Force Science Institute conducted several experiments in a 2014 study to measure police officer reaction time to start and stop shooting. In experiment one the officers were positioned in a firing stance with a training pistol, finger on the trigger, and were instructed to fire the pistol when a green light came on for 0.5 sec.

On average, it took officers 0.25 sec to begin the trigger pull (i.e. react to the stimulus) and 0.06 sec to complete the trigger pull (defined as the actual travel time of the trigger from a position of rest to a position back against the frame) for a total reaction time of .31 sec. This was when the police officer knew he was about to fire. (Lewinski, Hudson, & Dysterheftt (2014). Police Officer Reaction Time to Start and Stop Shooting: The Influence of Decision-Making and Pattern Recognition. Law Enforcement Executive Forum 14(2), 1-16).

If you are trying to hold someone at gunpoint, your reaction time in response to the thug’s movement will be much greater than 0.31 seconds because you must not have your finger on the trigger until you have made a conscious decision to intentionally fire a shot. Your reaction time will likely be closer to .50 to .75 seconds at a minimum and this assumes that you see and react to the thug’s movement the instant it occurs. If you are multi-tasking and calling 911, looking around for other threats, or dealing with other distractions, bystanders, etc. your reaction time will be much longer.

If you are going to try and take someone at gunpoint, it is critical that you do so from a position of cover if at all possible. While true cover is sometimes difficult to find, anything is better than standing in the open. Even if such material does not stop a bullet, it may deflect it or slow it down and reduce its wounding potential.

Massad Ayoob tells us that, in general, very few criminals dismiss or defy an armed citizen holding them at gunpoint – they tend to believe that citizens are more willing to shoot than the police. That implies that only irrational subjects with an emotional disturbance, a death wish, or extreme hatred/disdain of the armed citizen in question will defy commands at gunpoint. That does not mean they won’t try something as shown in this example.

Perhaps an even better solution is to tell the thug to depart. While it may grate on our conscience (HE STOLE MY STUFF!!), it is clearly preferable to being shot. Unless you are a police officer, you have no duty to try and hold the thug(s) for the police. Once again the thug’s reaction may be irrational. He may decide that you fear to shoot him and may start or resume threatening behavior so be prepared for such a reaction. 

If you find these useful, please follow via the link in the upper right.

Monday, November 27, 2023

The Range Master Nov 23 Drill of the Month

I went to the range this weekend and shot the Range Master Drill of the Month for November 2023.  Tom Givens and Range Master include their drill of the month in the Range Master monthly newsletter.  

Per the newsletter:

Target:  Use the IALEFI-Q, IDPA Cardboard, or RFTS-Q target

Scoring:  10 points for any hit inside the 8 inch circle in the chest, or inside the head ring. 5 points for any hit inside the silhouette but outside the 8”circle or the head ring.

Drill: Begin with the weapon holstered and concealed, loaded with only two rounds. On signal, draw, fire 2 rounds to the chest, reload the pistol and fire 2 more rounds to the chest, then one to the head circle. Record the time for the string.

Fire the drill at 5 yards and then again at 10 yards.

Ten rounds total. 100 points possible. Add the two times for a total time.

Hit Factor: Total points divided by total time = score. (Hit factor scoring)

Par score = 6. The goal is a score of 6 or higher.

This drill covers a concealed presentation from the holster, fast accurate shooting, an empty gun reload, and a transition to a smaller target. It also requires a timing shift when changing from 5 yards to 10 yards. This integrates a number of important skills in one fairly quick, low round count exercise.

I started my practice session with the Nov 23 DOTM shot cold with my P320 full size from concealment per the instructions. My five yard run was 4.69 seconds and my ten yard run was 6.87 seconds. I shot it clean with a total time of 11.54 seconds giving me a hit factor of 8.66.

I then ran the drill seven more times for practice and averaged my hit factor for those seven runs. My best run was 8.72 seconds with 90 points producing a hit factor of 10.32. The worst run of the seven was 11.34 clean with a hit factor of 8.81. My average for the seven “warmed up” runs was 10.22 seconds with a 9.56 hit factor.

My reload average for all runs was 2.37 seconds -- not very fast. I don't practice reloading as much as I should.

Good drill; I enjoyed it. The Range Master Monthly Newsletter has a lot of good information and is available at:

https://rangemaster.com/newsletter/

If you like these articles you can follow by clicking the link in the upper right corner. 


Friday, November 24, 2023

Vang Comp Thunderstick Summit 2023 - After Class Report

I recently attended the October 2023 Vang Comp Thunderstick Summit. The Thunderstick Summit is a 3-day training event which features instruction from some of the top defensive shotgun trainers in the United States.

The summit trainer line-up included Darryl Bolke, Greg Ellifritz, Steve Fisher, Mark Fricke, Erick Gelhaus, Rob Haught, and Matt Haught. I personally attended classes from all of the trainers except Steve Fisher. Nothing against Steve’s classes, time and availability became a consideration. For those of you familiar with the Range Master Tactical Conference, the summit was a similar round-robin format with students rotating between different ranges for classes.

The summit opened with classes geared toward novice shotgunners with a buckshot patterning exercise. Since I know how my shotgun patterns, it was a good warm up. My group then went to a different range to confirm how our shotguns performed with slugs—more warm up.

From my perspective, the highlights of my summit experience were classes from Mark Fricke and the father and son Haught duo. I was not familiar with Mark and found his support side/injured shooter and less lethal classes to be very informative. 

Rob and Matt Haught Demonstration

I received (fifth-hand+) instruction on the Haught push/pull technique many years ago when I worked with DEA in Lima, Peru and I was looking forward to receiving instruction directly from Rob Haught. I was not disappointed. The Haught’s classes were well structured and I learned a great deal about the push/pull and retention push/pull methods.

I am pretty well versed in the home defense use of the shotgun, so the other live fire classes I attended provided the opportunity to tune my execution of the push/pull technique. Effective deployment of the defensive shotgun requires a gun set up for that purpose and complete mastery of a specific set of basic techniques. While there are few “advanced” techniques when it comes to deploying the shotgun, tactical considerations do come into play. This is where the Ellifritz close quarters retention overview class and the Haught retention push/pull classes were useful.

Some of the classes stressed techniques more geared toward law enforcement deployment such as setting the shotgun up to enable an immediate switch to a slug and therefore were perhaps less useful to the private citizen. Using a slug inside your home is probably not a good idea given to the slug's penetration ability.  The need to exit your home to engage a violent criminal is certainly a possibility (an armed attack against a family member in the driveway for example); however, such a scenario is more likely to be solved with a handgun given the urgency of the response and the time needed to retrieve a shotgun.

I was somewhat surprised at the number of attendees who did not know how their shotgun functioned. During the slug exercise, the shooter next to me was having trouble chambering a round in his very well tricked out Beretta 1301. I reached over and hit his shell release. He then asked me what the button I pressed actually did? I told him that it released a shell from the magazine onto the lifter and he said he didn’t know the Beretta did that.

Vang Comp plans to sponsor the Thunderstick Summit as an annual event. If you are planning to go to next year here are a couple of tips for a satisfying summit:

    -- Know how your shotgun functions. As I mentioned above, many people struggled because they did not know how to load, unload, use the safety, and in general how their shotgun functioned. You will enjoy your time at the summit more if you are not trying to learn your gun’s basic functions on the fly.

    -- If you are using your shotgun at the summit (Vang does provide rental guns), make sure the ammunition you bring actually functions in your gun. Some guns (notably Mossberg semiautomatic shotguns), are particularly finicky with some birdshot loads. I noticed several shooters struggling with ammunition that did not function reliably in their shotguns. On the positive side, they did receive a lot of practice clearing failures to eject, failures to load, etc.

    -- Ensure you have a sling for your shotgun. While I do not recommend a sling for a home defense shotgun, from a practical perspective the shotgun gets heavy when you carry it around all day. In classes, there is some time spent standing and holding the gun during demonstrations, relay rotation, etc. A sling makes life much easier in this regard.

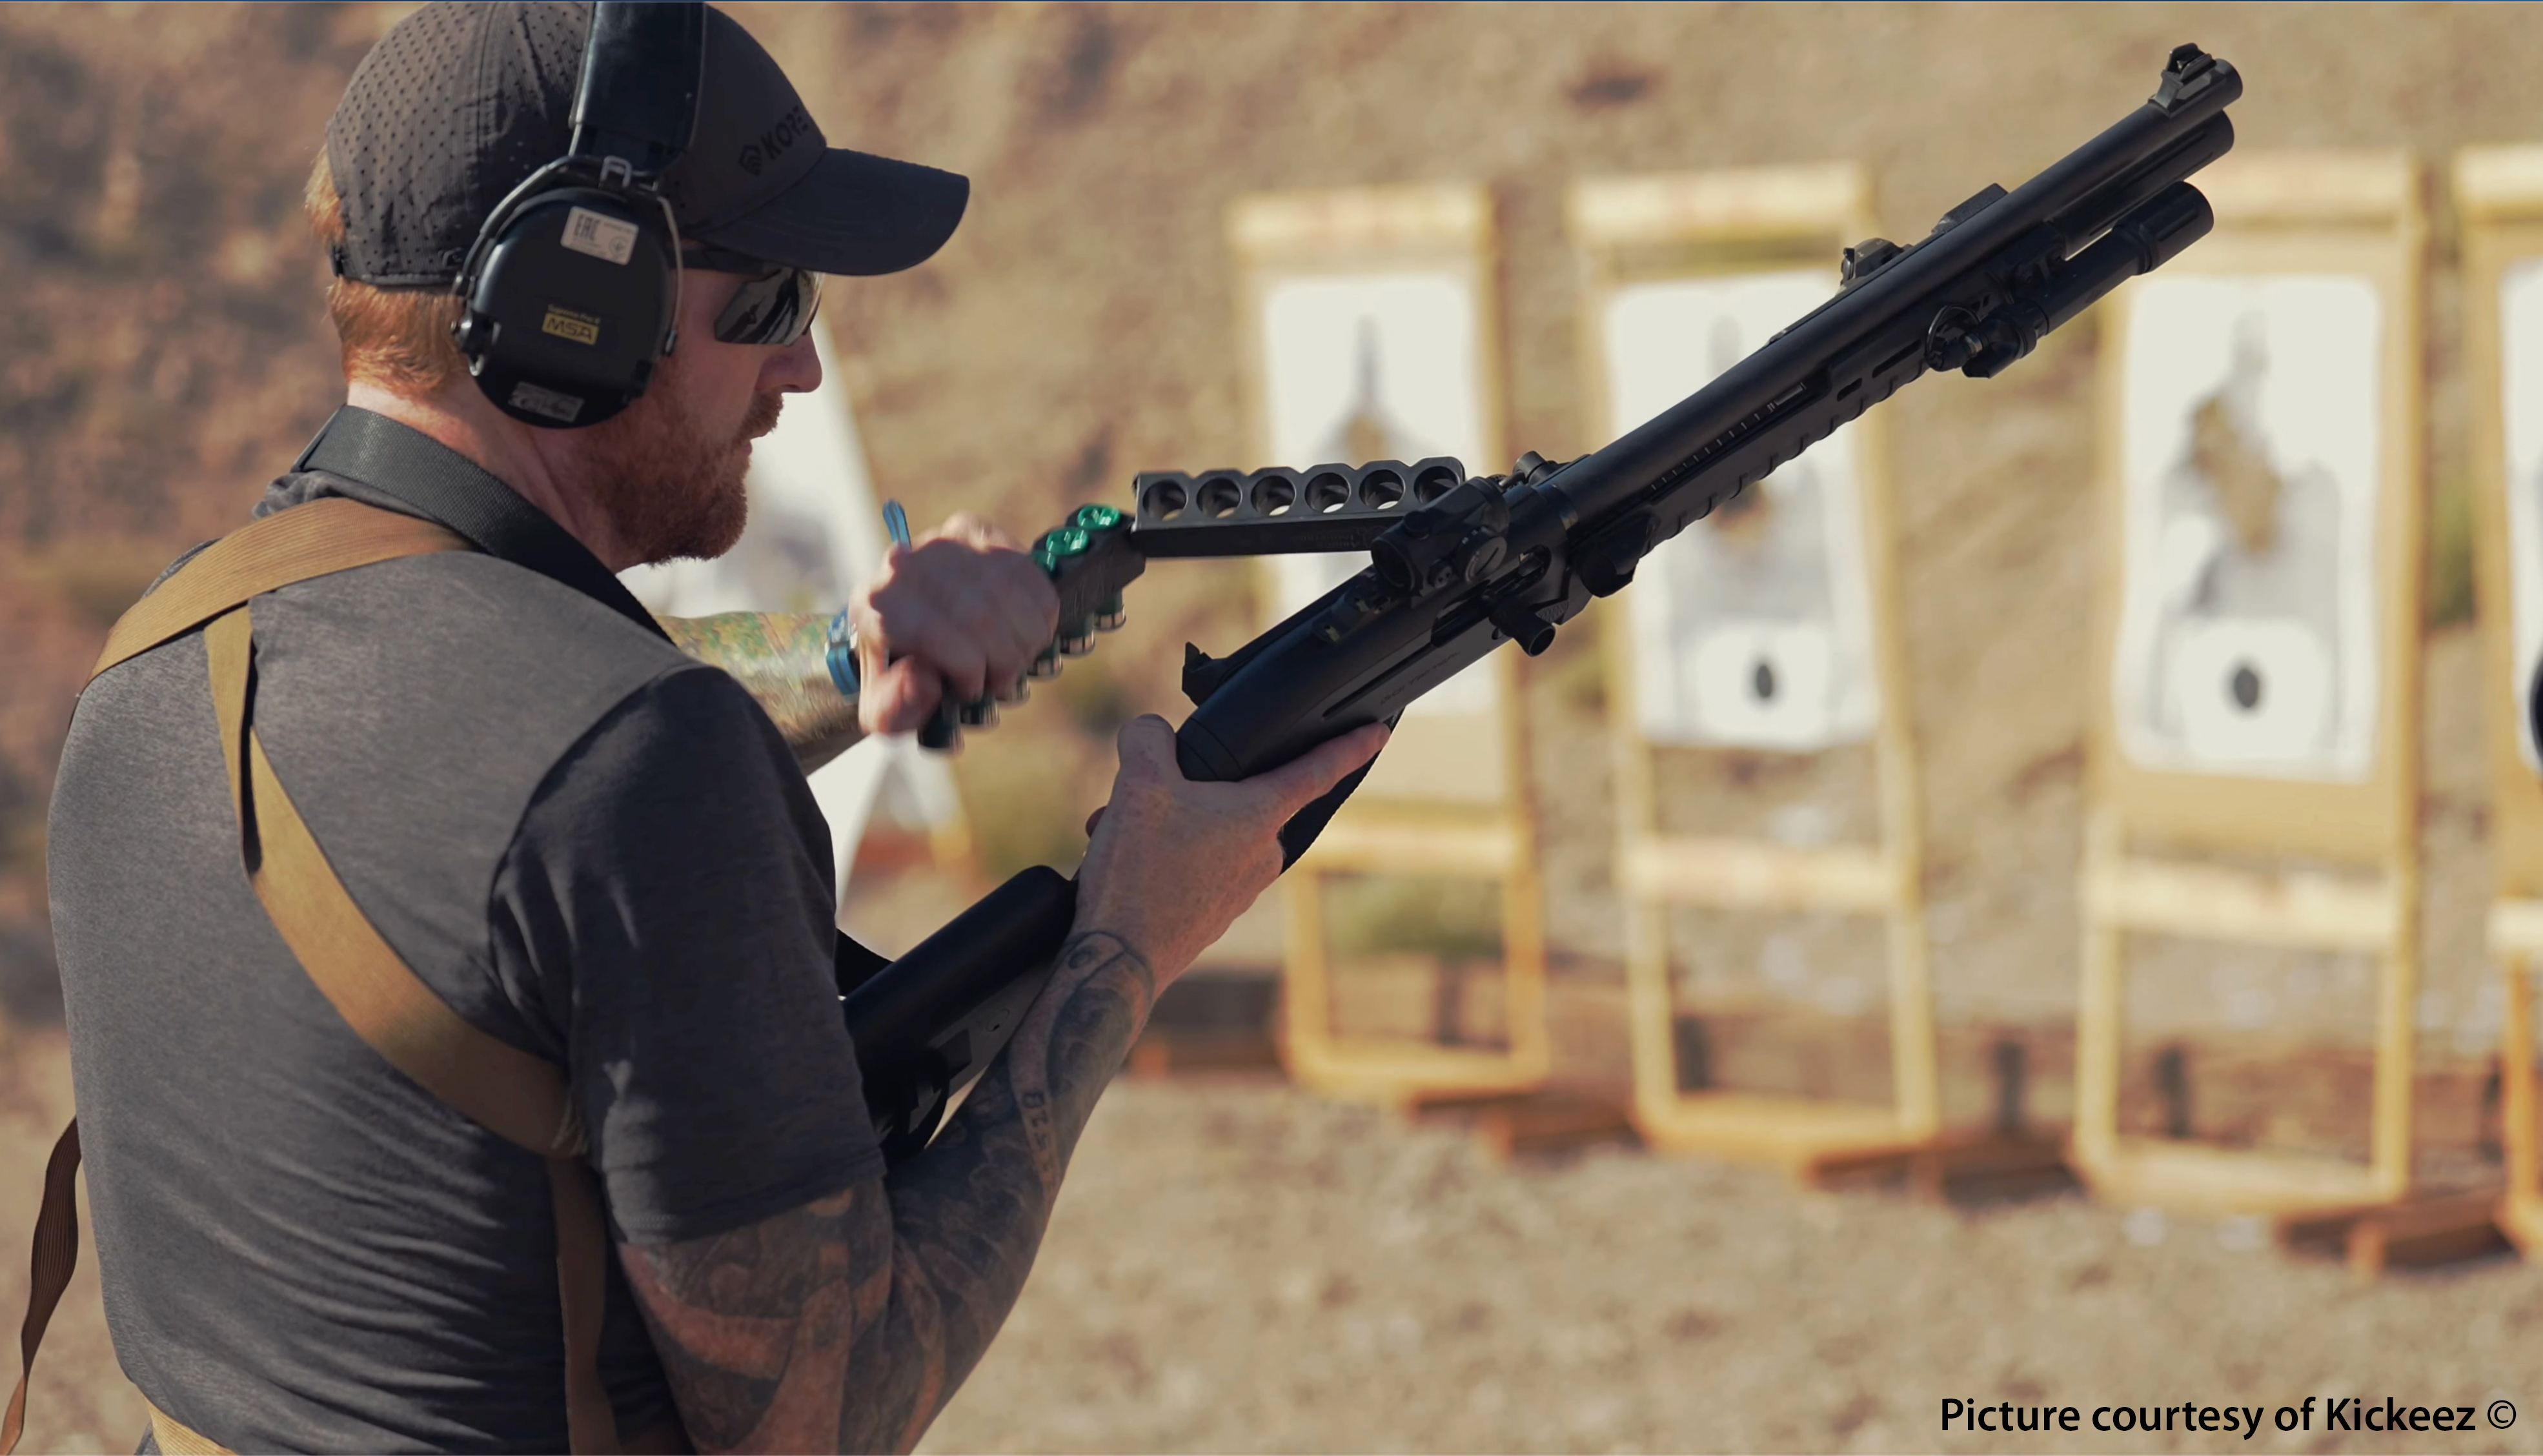
Adam Roth replacing a Quick-Detach Carrier
    -- An ammunition sidesaddle or butt cuff on the gun helps with the classes containing loading exercises. In a home defense scenario you are probably going to deal with the incident using only the ammunition on or in the gun so learning how to load with ammo on the gun is important. The picture on the right shows Adam Roth owner of Aridus Industries (a Thunderstick Summit 23 sponsor) replacing an empty Quick-Detach Carrier with a loaded one.*  

    -- You should also have the ability to carry additional ammunition to the firing line on your person. I found the 5.11 Flex Shotgun Ammo Pouch to be very handy in that regard. Others used elaborate chest rigs, bandoleers, belts, and other accouterments. Unless you practice with the elaborate rigs and have them staged and ready to go, you are unlikely to be able to use them in a home defense response.

Next year’s Vang Comp Thunderstick Summit is planned for October 11 – 13, 2024 at the Firearms Academy of Seattle, WA. If you are into shotguns I would certainly recommend it. Vang has not announced the enrollment dates as of this writing. See the Vang Comp System’s website for more information (https://vangcomp.com/)

If you like these articles you can follow by clicking the link in the upper right corner.  

* Some pictures courtesy of Kickeez (https://kickeezproducts.com/)

Friday, November 17, 2023

Check Your Shotgun Ammunition

When you are using a shotgun, always double check your ammunition and ensure you are using ammunition of the correct gauge. This is particularly true if you own shotguns in several gauges which increases the potential to mix shells. Although many ammunition companies use different colored shells for different gauges, this is not always the case. Several people have told me that they have found stray shells of different gauges in new factory ammunition boxes. Something that is clearly plausible/possible; however, I do not have any direct knowledge of this.

In a shotgun instructor class I completed, the instructor (Tom Givens of Range Master) mentioned the chance of mistakenly placing 20 gauge ammunition in a 12 gauge shotgun. The 20 gauge may slide down the barrel far enough so that the shooter can unwittingly load a 12 gauge shell in the chamber behind the 20 gauge shell and fire it with the obvious potential for catastrophic results.

A friend of mine and I were checking Federal FliteControl patterns in a variety of older shotguns. Remembering Tom’s comment, we decided to drop a 20 gauge shell down a 12 gauge barrel to see how far it would enter the barrel. We then placed a dummy round in the gun and closed the action; putting the gun in a firing condition. In the picture sequence below you can see how this can happen.


Ironically in the shotgun instructor course, one of the students in the class had a gun that suddenly would not chamber a round. Examination showed that the barrel was obstructed with another shotgun shell. Considerable pounding with a cleaning rod produced a 16 gauge shell that had entered and become stuck in the barrel. The student sheepishly admitted that he owned a 16 gauge shotgun. Both shells were the exact same red color and only a close examination would have identified the 16 gauge shell.

If you are setting up your shotgun for home defense, a couple of additional inspections are appropriate. Examine the primers, ensure that the shells are not damaged or corroded, properly crimped, and that the shell mouth has not expanded. Shotgun shells that have been in a tubular magazine for an extended length of time occasionally swell which may result in an inability to chamber the shell.

If you find these articles useful please “follow” using the link in the upper right hand corner of the page. Your information will never be sold.